Transform Your Windows: A Complete Guide to IKEA Aluminium Venetian Blinds
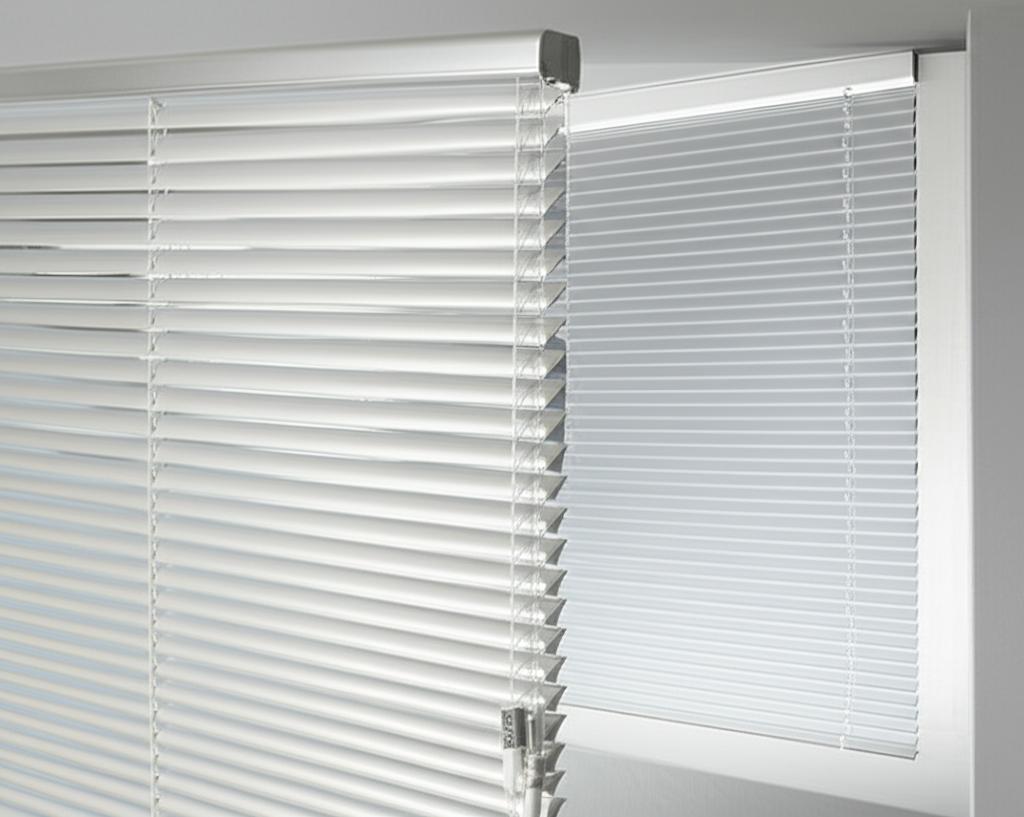
Welcome, fellow home improvers! If you’re looking for a stylish, practical, and budget-friendly way to enhance your living space, aluminium venetian blinds from IKEA are a fantastic choice. Known for their sleek lines, excellent light control, and surprising durability, these blinds offer a modern aesthetic that complements almost any décor.
But perhaps you’re wondering, “How easy are they to install?” or “Can I really do this myself?” The answer is a resounding yes! With a little preparation and the right guidance, you’ll have your windows looking fantastic in no time. This detailed guide will walk you through everything you need to know, from measuring to installation, ensuring a smooth and successful DIY project.
Why Choose Aluminium Venetian Blinds from IKEA?
Before we dive into the nitty-gritty, let’s quickly highlight why these blinds are such a popular option:
- Sleek & Modern: Their minimalist design adds a contemporary touch to any room.
- Exceptional Light Control: The adjustable slats allow you to precisely control the amount of light entering your room, from bright and airy to dim and private.
- Durable & Easy to Clean: Aluminium is resistant to moisture and rust, making these blinds ideal for kitchens and bathrooms. They’re also simple to wipe clean.
- Budget-Friendly: IKEA is synonymous with affordability, and their blind options are no exception, offering great value without compromising on style.
- DIY Friendly: Designed with the home assembler in mind, they are surprisingly straightforward to install.
Getting Started: Preparation is Key!
The secret to a stress-free blind installation lies in meticulous preparation. Don’t rush this stage!
1. Measure, Measure, Measure!
This is arguably the most crucial step. Accuracy here prevents headaches later.
- Width: Measure your window opening in three places – top, middle, and bottom. Use the smallest measurement for an inside mount, and add a few inches for an outside mount (more on this below).
- Length (Height): Measure from the top of your window frame to the bottom sill in three places as well. Use the longest measurement for an inside mount. For an outside mount, measure from where you want the headrail to sit to where you want the blind to end.
Important Considerations:
- Inside Mount: The blinds fit inside the window frame. This gives a clean, recessed look. Ensure there’s enough depth in your window recess for the blind headrail. You’ll need to measure the exact opening size.
- Outside Mount: The blinds are mounted outside the window frame, covering the entire opening and often extending beyond it. This can make the window appear larger and provides better light blockage around the edges.
2. Gather Your Tools
You won’t need an arsenal of power tools, but having these basics on hand will make the job much easier:
- Tape Measure: Essential for accurate measurements.
- Pencil: For marking drill points.
- Spirit Level: To ensure your blinds are perfectly straight. This is vital!
- Drill: With appropriate drill bits for your wall type (wood, plasterboard, masonry).
- Screwdriver: Or a drill with screwdriver bits.
- Safety Glasses: Always protect your eyes when drilling.
- Step Ladder: If your windows are high.
- Sharp Knife or Hacksaw (if cutting is needed): Many IKEA blinds are designed to be cut to size, so check your specific product’s instructions.
Step-by-Step Installation Guide
Ready to get hands-on? Let’s install those blinds!
Step 1: Unpack and Inspect
Carefully unpack your blinds. Check all components against the parts list in your IKEA manual. Make sure nothing is missing or damaged. It’s always a good idea to lay everything out so you can easily identify each piece.
Step 2: Adjusting the Blinds (Width & Length – If Necessary)
This is a common feature of IKEA blinds that makes them so versatile. Read your specific blind’s instructions carefully as the method can vary slightly.
- Trimming the Width: If your window is narrower than the blind, you’ll likely need to trim the headrail and the slats.
- Measure the excess: Subtract your window width (or desired blind width) from the blind’s full width. This is the amount you need to remove.
- Mark the headrail: Use your pencil and tape measure to mark the headrail where it needs to be cut.
- Cut the headrail: Use a fine-toothed hacksaw to carefully cut the aluminium headrail. A clean cut is important for a neat finish.
- Cut the slats: This often involves a special cutting jig included with the blind, or you might need to use a sharp knife or tin snips to trim each individual slat. Be precise and take your time! Cutting a little at a time is better than cutting too much at once.
- Adjusting the Length: Most venetian blinds allow you to remove excess slats from the bottom to adjust the length.
- Unclip the bottom rail.
- Remove the desired number of slats.
- Re-attach the bottom rail.
Common Mistake to Avoid: Cutting before double-checking your measurements. Always measure twice (or three times!) before making any cuts.
Step 3: Mark Bracket Placement
This is where your pencil and spirit level come in handy.
- Hold the headrail: Temporarily hold the blind headrail in place where you want it to be installed (inside or outside the window frame).
- Mark bracket positions: Use a pencil to mark where the mounting brackets should go. Ensure they are evenly spaced and level.
- Use your spirit level: Place your spirit level on top of the marked points to ensure they are perfectly horizontal. Even a slight tilt will be noticeable once the blinds are up.
Step 4: Install the Mounting Brackets
Now it’s time to drill!
- Pilot holes: Using your drill, create pilot holes at your marked points. The size of the drill bit depends on the screws and your wall material. For plasterboard, you might need wall anchors. For wood, the screws will likely go straight in.
- Screw in the brackets: Securely fasten the mounting brackets with the screws provided. Make sure they are snug but don’t overtighten, especially if drilling into plasterboard.
Step 5: Attach the Blind
This is often the easiest part!
- Click into place: Gently lift the assembled blind and align its headrail with the installed brackets. Most IKEA blinds are designed to simply click or snap into place within the brackets. You might hear an audible click when it’s properly seated.
- Secure (if necessary): Some brackets have a small lever or screw to further secure the blind in place. Follow your specific product’s instructions.
Step 6: Test and Adjust
- Operate the blind: Gently operate the tilt wand to open and close the slats.
- Test the pull cord: Raise and lower the blind using the pull cord. Does it move smoothly?
- Troubleshoot: If anything feels stiff or doesn’t move correctly, double-check that the headrail is properly seated in the brackets and that nothing is obstructing the mechanism.
Tips for Success
- Measure, measure, measure! We can’t say it enough. Precision is key.
- Use a spirit level for perfection. A crooked blind will be a constant annoyance.
- Invest in good drill bits. The right bit for the right material will make drilling easier and cleaner.
- Clean as you go. A quick wipe of dust from drilling will save you a cleaning job later.
- Don’t rush the cutting process. If you need to trim the blind, take your time and follow the instructions meticulously.
- Get a helper if possible. Especially for wider blinds, an extra pair of hands makes marking and holding much easier.
Common Mistakes to Avoid
- Not measuring accurately: Leads to ill-fitting blinds, gaps, or needing to return and exchange.
- Forgetting to check window depth (for inside mount): The headrail needs enough space to fit without hitting the windowpane.
- Skipping pilot holes: Can cause wood to split or make screws difficult to drive into tough materials.
- Using the wrong type of anchors/screws: If you’re drilling into plasterboard or concrete, standard wood screws won’t hold the weight of the blind. Use appropriate wall anchors.
- Over-tightening screws: Can strip the screw head or damage the wall material.
- Cutting the blind the wrong way: Always double-check which side to cut if instructions indicate only cutting from one side.
- Ignoring the instructions: While this guide is comprehensive, your specific IKEA product will have its own detailed manual. Always refer to it.
Maintaining Your Aluminium Venetian Blinds
Once your blinds are up, keeping them looking their best is simple:
- Regular Dusting: Use a feather duster, a microfibre cloth, or the brush attachment on your vacuum cleaner to gently dust the slats with the blind fully closed.
- Spot Cleaning: For stubborn marks, use a damp cloth with a mild soap solution. Wipe gently, then dry with a clean cloth. Avoid harsh chemicals or abrasive cleaners.
- Operate Gently: Always use the tilt wand and pull cord smoothly. Yanking can damage the internal mechanisms.
Frequently Asked Questions (FAQs)
- Are IKEA aluminium blinds suitable for bathrooms?
Yes, generally. Aluminium is resistant to moisture and rust, making them a good choice for humid environments like bathrooms and kitchens. - Do these blinds provide blackout?
While aluminium venetian blinds offer significant light control, they are not typically considered 100% blackout. Small gaps between the slats and around the edges of the blind will usually allow some light to filter through. - How do I clean the pull cords and wands?
You can wipe them down with a damp cloth, just like the slats. - Can I shorten the cords for child safety?
IKEA blinds often come with child safety features. Always ensure any excess cords are managed according to the safety guidelines in your product manual to prevent hazards. - What if my blind isn’t level after installation?
Carefully re-check your bracket placement with a spirit level. You might need to slightly adjust one of the brackets up or down to achieve perfect alignment.
Conclusion
Congratulations! You’re now equipped with the knowledge to successfully measure for and install your aluminium venetian blinds from IKEA. These versatile and attractive window coverings are a fantastic way to control light, enhance privacy, and add a touch of modern style to your home. By following these steps and tips, you’ll enjoy a rewarding DIY experience and beautiful, functional blinds for years to come!
FAQ
Q. Where can I purchase IKEA aluminium Venetian blinds?
A. IKEA aluminium Venetian blinds are typically available for purchase at IKEA stores worldwide, as well as through their official online store. Availability may vary by region and specific product lines, so it’s always recommended to check the IKEA website or your local store’s stock before visiting.
Q. What standard sizes do IKEA aluminium Venetian blinds come in?
A. IKEA blinds are generally offered in a range of standard widths and drops designed to fit common window dimensions. While they do not typically offer custom-made blinds, you can often cut the width of most IKEA Venetian blinds to fit your window precisely using a hacksaw, following the instructions provided with the product. The drop length can also be adjusted by removing slats from the bottom.
Q. How difficult is it to install IKEA aluminium Venetian blinds?
A. IKEA products are known for their DIY-friendly design, and their aluminium Venetian blinds are no exception. They usually come with clear, step-by-step instructions and all necessary mounting hardware. Basic tools like a drill, tape measure, and screwdriver are typically sufficient for installation. Most users find the installation process straightforward and manageable.
Q. What is the best way to clean IKEA aluminium Venetian blinds?
A. Aluminium Venetian blinds are relatively easy to clean. For regular maintenance, simply dust the slats with a soft cloth, a duster, or a vacuum cleaner with a brush attachment. For more thorough cleaning, you can wipe the slats individually with a damp cloth soaked in mild soapy water, ensuring to dry them immediately to prevent water spots. Avoid harsh chemical cleaners as they may damage the finish.
Q. How effective are IKEA aluminium Venetian blinds at controlling light and privacy?
A. Aluminium Venetian blinds are excellent for precise light control due to their adjustable slats. You can tilt the slats to direct incoming light upwards or downwards, reducing glare while still illuminating the room. When fully closed, they offer a high degree of privacy and block a significant amount of light, though some light leakage may occur around the edges of the blind.
Q. Are IKEA aluminium Venetian blinds durable?
A. Yes, aluminium is a naturally durable, lightweight, and rust-resistant material, making it ideal for blinds. IKEA aluminium Venetian blinds are designed for everyday use and are generally quite robust. With proper care and installation, they can withstand regular tilting and raising for many years, providing a long-lasting window covering solution.
Q. Do IKEA aluminium Venetian blinds come with child safety features?
A. IKEA prioritizes child safety, and their blinds typically comply with safety standards. Modern IKEA Venetian blinds often include safety features such as breakaway cords or cord cleats to keep cords out of reach of small children, reducing the risk of entanglement. Always ensure any cords are secured safely away from children and pets.